
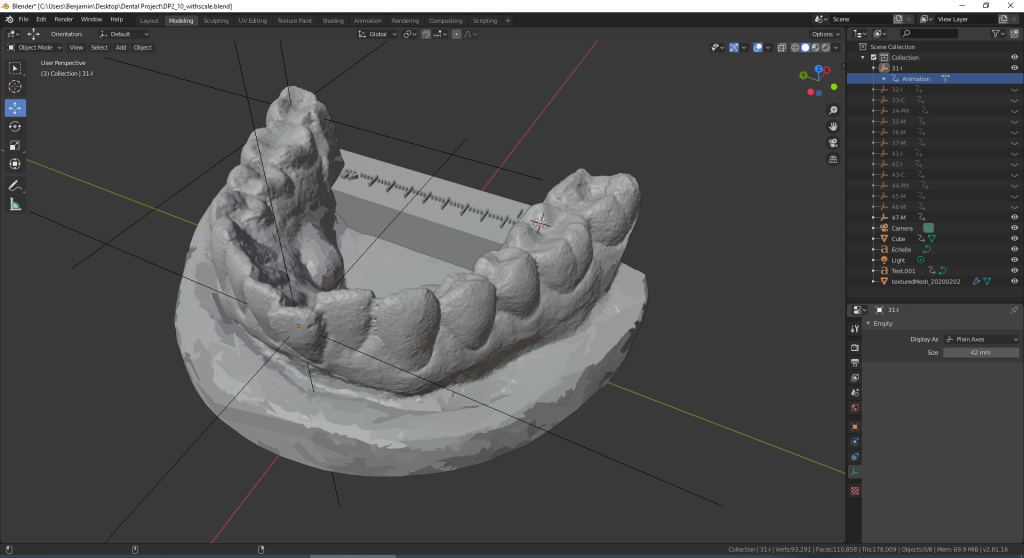
Once I get the 3D model from Meshroom, the next challenge was to exploit this model : clean it up a little, isolate teeth and make them move.
For that, I use Blender, another great free and opensource software. However, in the discovering of Blender, I had the impression to work with Photoshop : it’s a powerful tool, but quick hard to event start for a beginner.
The learning was a bit long and I had to read some articles and watch multiples Youtube tutorials.
An important thing is to have a model at the right scale : Meshroom create a 3D model, but I had to scale it. For that, I use a pide-à coulisse to measure precisely the plaster mold and scale the 3D model on Blender.
(I mess up my first scaling, and the first aligner that I made was to small and I felt it on my teeth, it was hurting)
So to improve my scaling, I went back and forth between the 3D model that I 3D printed to re-measure and re-scale.
The useful functions I found were:
-
-
- Ctrl+L : Select all linked vertices, really helpful to remove undesired independants objects
- Intersect (Knife) tool : to have a plan base, I use this post’s answer
- Mesh > Clean Up > Decimate Geometry : Reduce the number of vertices and faces on non-essential part of the model. I ended up with a model with 70k vertices (~14Mb)
- Circle select (c) : To select part of the model to isolate a tooth. Combine with “Esc” to exit the circle tool, I could jungle with selection and moving into the model.
- Ctrl+H > Hook to new object : Once a tooth selected, I could create a separate object in order to move it later
-
At this time, I had discussion about my project with 2 people that had aligners. I had learn some interesting informations:
-
-
- The first aligner hurt a little bit more than the others
- Teeth “naturally” move forward
- In order to realign front teeth, sometimes I will have to create space by moving back the molars
- Top and bottow jaw are “linked” : align one of them will have an impact on the other. So I decided to do aligners for the top too (and correct a minor thing)
- The time between two aligners is around 2 weeks
-
After, I “just” had to do the animation, in order to have multiples steps to print.
I read here that teeth can move from 0,4 to 1,2/per month. Another website says 0,2mm per week (or 2 degre).
To be prudent, I choose to be under 0,2 mm per week. (or at least try)
For animation, I also had to learn how it works:
-
-
- I > LocRot : Add a keyframe. One at the begining, one at the end (LocRot as LocationRotation)
- G : move the object
- R : rotate the object
-
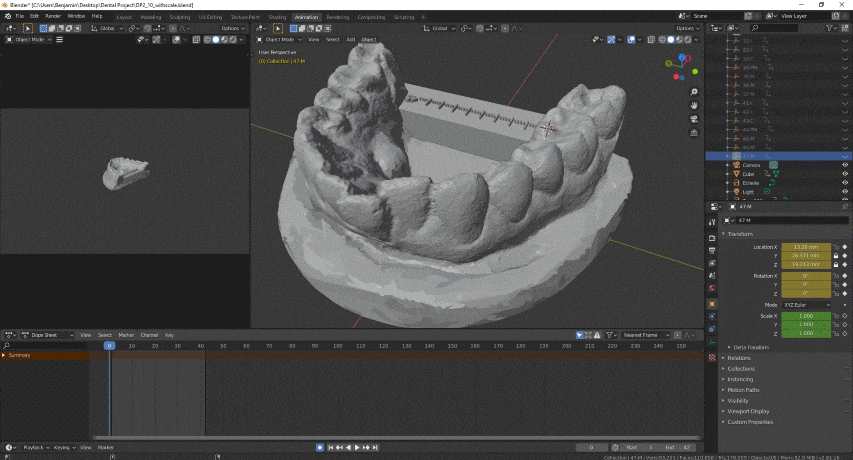
At the end, the gum is deformed, but only the teeth count, as the aligner only need them. However, I’m a bit skeptical for the last move (front tooth), I may need to work more on it (and slow it down).
The model is clear, and the animation is fine, I solved the second challenge !
Next step, the aligner’s printing !